
The Arduino programming language is basically a framework built on top of C/C++. A program written in the Arduino Programming Language is called sketch. A sketch is normally saved with the “.ino” extension .
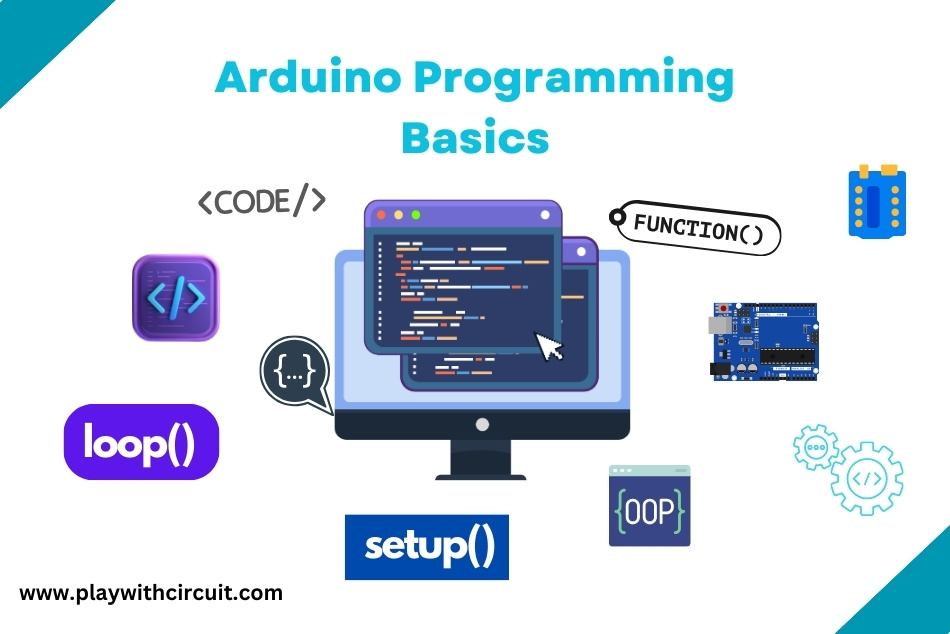
In this article, we will explore the basics of Arduino programming. We will learn about the basic structure of Arduino programming and some of the important concepts of Arduino programming.
Arduino – Program Structure
The basic structure of the Arduino programming language is simple and runs in two parts. These two parts, or functions, enclose blocks of statements.
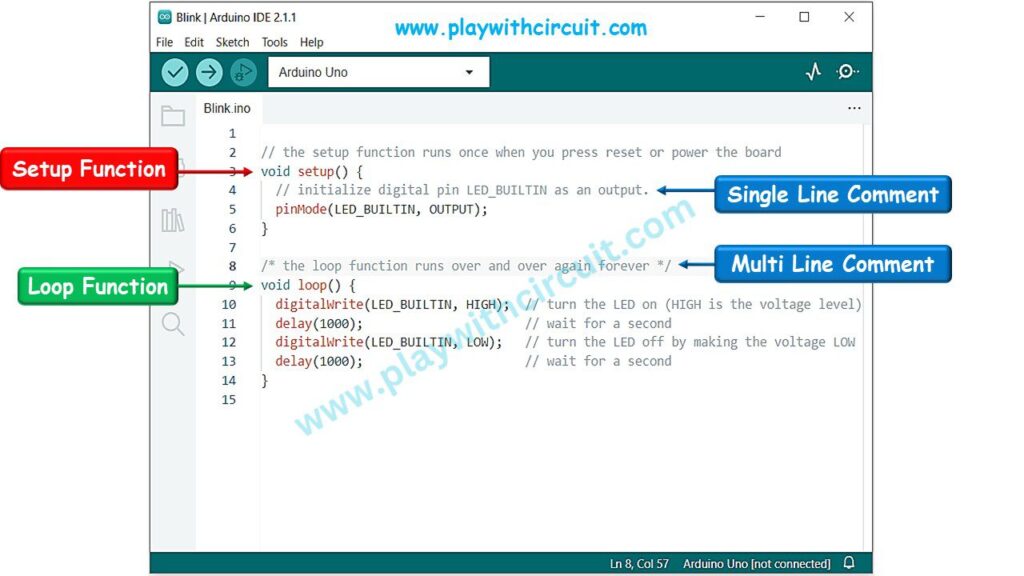
Here setup() is the preparation or initialization part of the program and loop() is the repetitive and continuous execution of the Arduino program. Both functions are required for the program to work.
void setup() – This function executes only once at the beginning of the program. This function executes only once in the beginning. Here we define the mode of a particular pin like pinMode(LED_BUILTIN, OUTPUT), the initialization of serial communication or a library. The “void” indicates that nothing is returned on execution.
void setup() {
  // initialize digital pin LED_BUILTIN as an output.
  pinMode(LED_BUILTIN, OUTPUT);
}
void loop() – It is the main program loop that runs continuously after the “setup” function has been executed. This function executes the core logic of the program, it runs over and over again.
This function may include reading sensor values, performing calculations, turning ON/OFF LED based on an input, and responding to events. It continues to execute in a loop until the program is terminated.
// the loop function runs over and over again
void loop() {
  digitalWrite(LED_BUILTIN, HIGH);  // turn the LED on (HIGH is the voltage level)
  delay(1000);                      // wait for a second
  digitalWrite(LED_BUILTIN, LOW);   // turn the LED off by making the voltage LOW
  delay(1000);                      // wait for a second
}
Understanding Arduino Programming Concepts
Comment
You can add single-line comments to your code using double slashes (//) and block comments, or multi-line comments using /*… */. Comments are ignored by the compiler and do not affect the execution of the program. They are used after a valid statement to provide more information about the purpose or functionality of specific code segments or to provide a future reminder.
// this is a single line comment
/* this is an enclosed block comment don’t forget the closing comment – they have to be balanced! */
Spaces
Spaces, tabs, and line breaks are used for code formatting to improve readability and organization.
Curly braces {}
Curly braces (also referred to as just “braces” or “curly braces”) define the beginning and end of function blocks and statement blocks such as the void loop() function and the for and if statements.
type function()
{
statements;
}
An opening curly brace ‘{‘ must always be followed by a closing curly brace ‘}’. If we don’t put ‘}’, it can often lead to compiler errors that can sometimes be hard to track down in a large program.
Semicolon
A semicolon is used to end a statement and separate elements of the program. For example, if you want to declare and initialise a variable in Arduino, you would write:
int myVariable = 10;
In the above code, the semicolon at the end of the line indicates the end of the statement.
Similarly, if you want to call a function in Arduino, you would use a semicolon to terminate the function call:
myFunction();
Note* It’s important to include the semicolon at the end of each statement in Arduino programming, as omitting it can result in compilation errors.
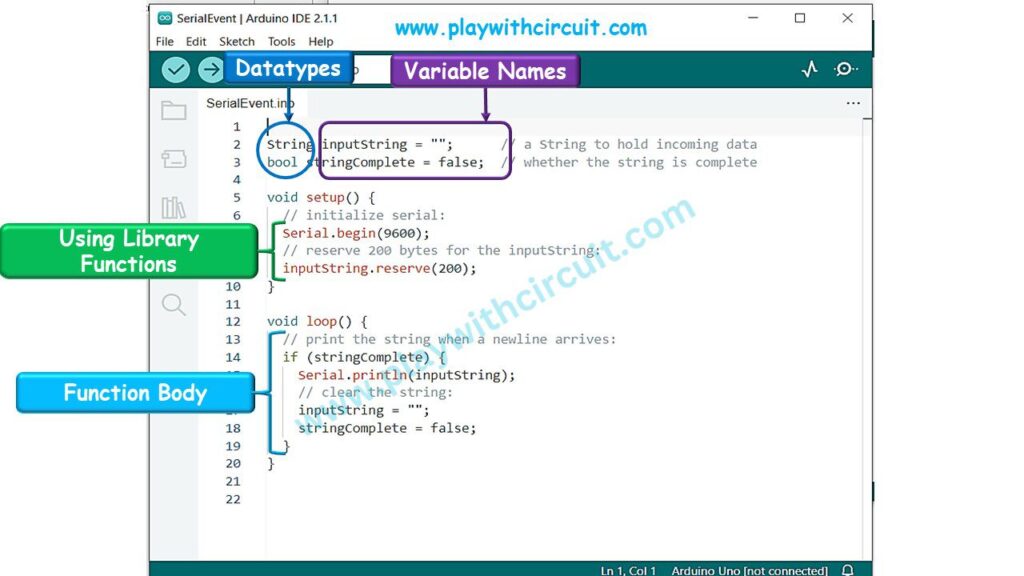
Variables
A variable is a way of naming and storing a numerical value for later use by the program. Variables can be numbers that can be continually changed as opposed to constants whose value never changes. Also variable can be a character value or any String.
A variable need to be declared and optionally assigned to the value needing to be stored. The following code declares a variable:
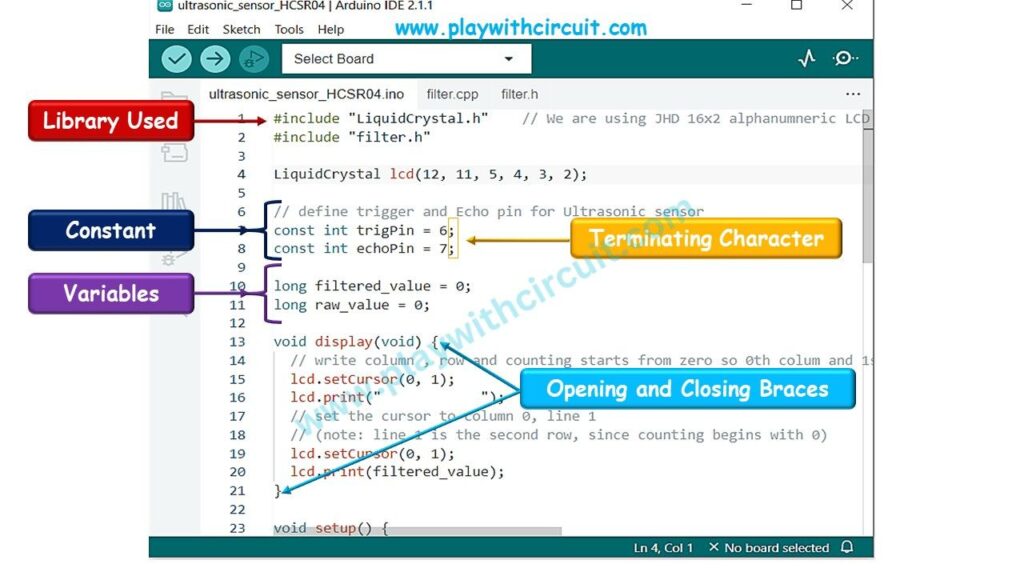
long filtered_value = 0;
long raw_value = 0;
Variables can be initialised with an initial value at the time of declaration. For example:
bool stringComplete = false; // whether the string is completeYou can declare variables at the beginning of the sketch, within functions, or as global variables accessible throughout the program.
Data Types
Arduino supports several data types, including:
- int: Used to store integer values (whole numbers).
- float: Used to store floating-point values (decimal numbers).
- char: Used to store single characters.
- boolean: Used to store either true or false values.
- string: Used to store a sequence of characters.
Here is an example of a string and boolean type of variable declared:
String inputString = "";      // a String to hold incoming data
bool stringComplete = false;  // whether the string is complete
Constants: In Arduino, you can also define constants, which are variables whose value cannot be changed once set. Constants are typically declared using the const keyword. For example:
const int trigPin = 6;
const int echoPin = 7;
Functions
A function is a block of code that has a name and a block of statements that are executed when the function is called. They allow you to organize your code into modular and reusable components.
Custom functions can be written to perform repetitive tasks. Functions are declared by first declaring the function type. This is the type of value to be returned by the function such as “int” for an integer type function. If no value is to be returned the function type would be “void”.
Digital Input/Output
They are used to interface with external devices and sensors. Digital inputs are used to read the state of a digital signal, which can be either HIGH (5V) or LOW (0V). The Arduino board has several digital pins that can be configured as inputs using the pinMode() function. Digital outputs are used to send a digital signal, either HIGH or LOW, to control external devices such as LEDs, motors, or relays.
// declare sensor pin as input pin
pinMode(sensorInput, INPUT);
// read input value
sersorValue = digitalRead(sensorInput);

// initialize digital pin LED_BUILTIN as an output.
pinMode(LED_BUILTIN, OUTPUT);
// turn the LED on (HIGH is the voltage level)
digitalWrite(LED_BUILTIN, HIGH);
Analog Input/Output (I/O)
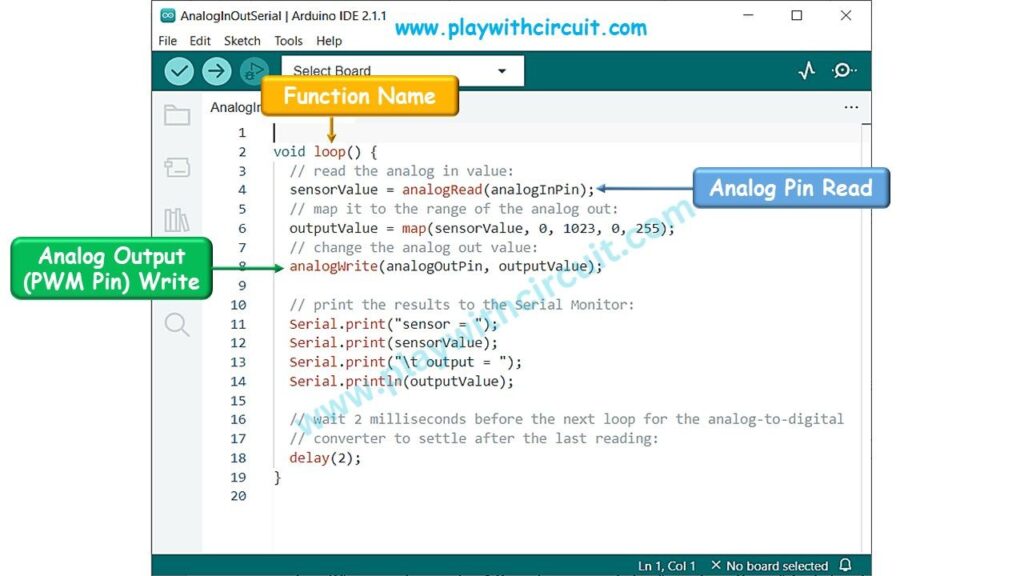
Analog inputs are used to read continuous analog signals from sensors, such as light sensors, temperature sensors, or potentiometers. Arduino boards typically have 6 analog input pins, which are represented by numbers A0, A1, A2, A3, A4, A5.
Analog inputs are read using the analogRead() function, which returns a value between 0 and 1023 representing the voltage level.
Analog outputs (PWM – Pulse Width Modulation) allow you to simulate an analog voltage by rapidly switching a digital signal ON and OFF. This is useful for controlling devices like servo motors or dimming LEDs. Arduino boards have several digital pins capable of analog output, denoted with a tilde (~) symbol. The analogWrite() function is used to set the analog output value.
 // read the analog in value:
  sensorValue = analogRead(analogInPin);
 // map it to the range of the analog out:
  outputValue = map(sensorValue, 0, 1023, 0, 255);
 // change the analog out value:
  analogWrite(analogOutPin, outputValue);
Libraries
Arduino provides libraries that contain pre-written code to simplify complex tasks. Libraries extend the functionality of Arduino by providing additional functions and features. They contain functions, constants, and classes that can be used to extend the capabilities of the Arduino board.
/* For using JHD 16x2 alphanumeric LCD using HD44780 controller for its controller */
#include "LiquidCrystal.h" 


